[from Internet] How to Create an Amazing Watercolor Artwork in Photoshop
source:http://www.photoshoptutorials.ws/photoshop-tutorials/photo-manipulation/create-amazing-watercolor-artwork-photoshop/
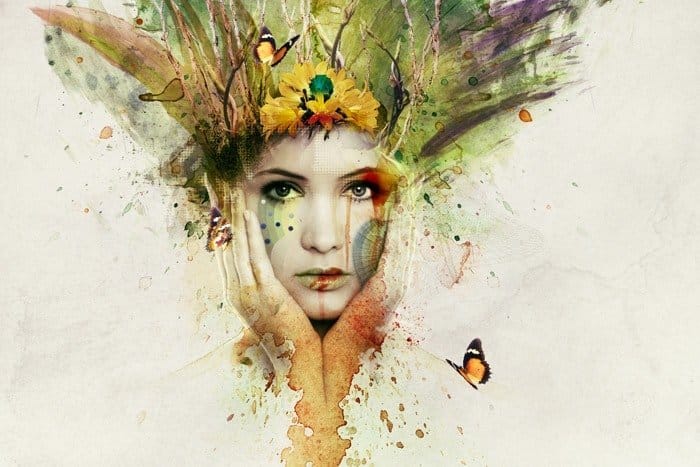
Preview of Final Results
Tutorial Resources
Step 1
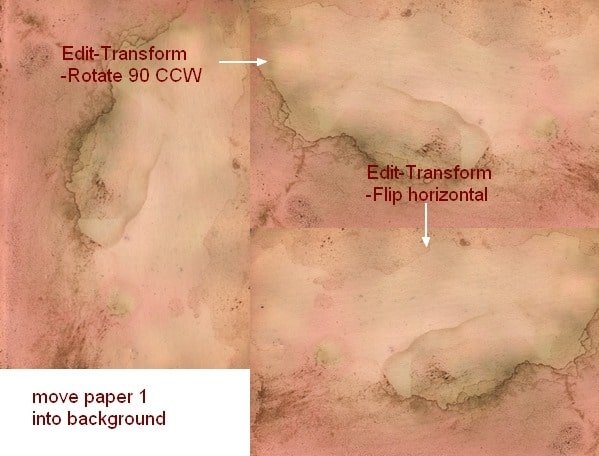
Create a new document and fill it with white. I use the size with 1200×800 but feel free to make your own. Open paper 1 stock, move it into our white canvas then rotate it (choose Edit-Transform-Rotate 90 CCW) . Right click this layer, choose Convert to Smart Objects. Then choose Flip Horizontal:
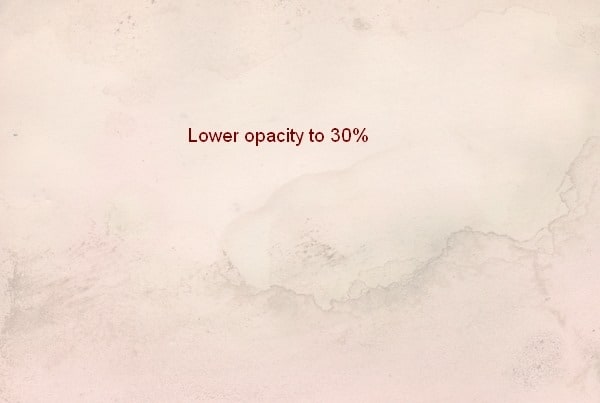
Lower opacity to 30%:
Step 2
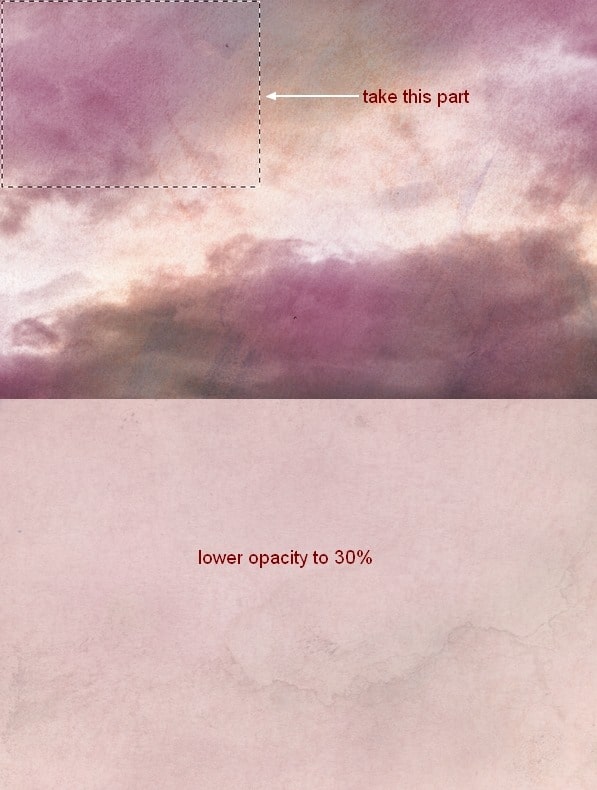
Open paper 2 stock, use Rectangular Marquee Tool to make a selection on the top left of it and use Move Tool (V) to drag it into our picture and lower opacity to 30%:
Step 3
I use an adjustment layer to change color of the picture. Go to Layer-New Adjustment Layer-Hue/Saturation:
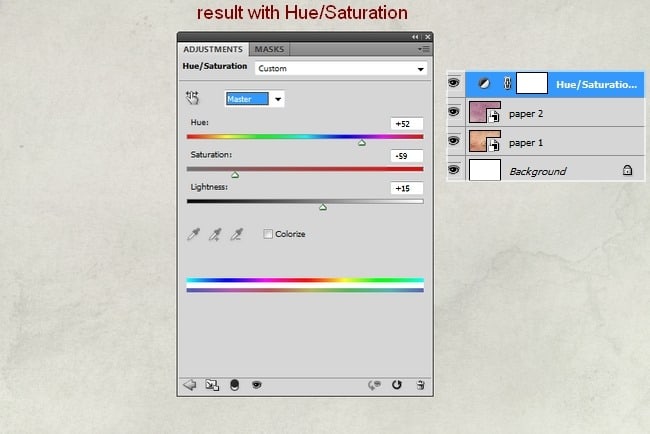
Step 4
Extract model and place her at the center section then I use layer mask to remove hard edges and blend her with background:
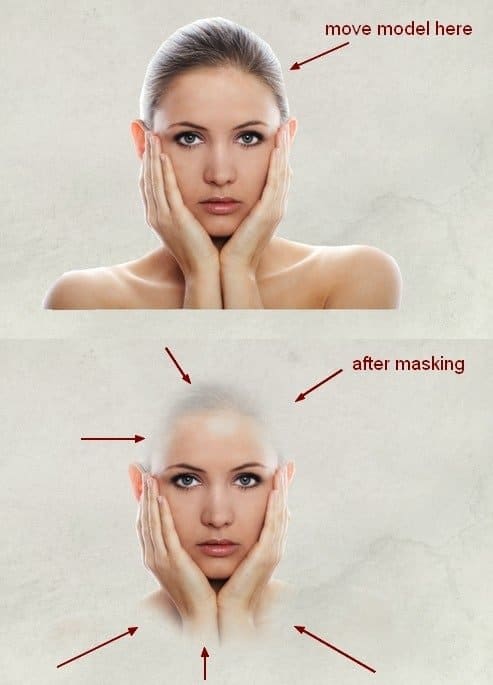
Step 5
I use some adjustment layers (Hue/Saturation, Color Balance, Curves) with Clipping Mask for model to reduce saturation and brighten her:
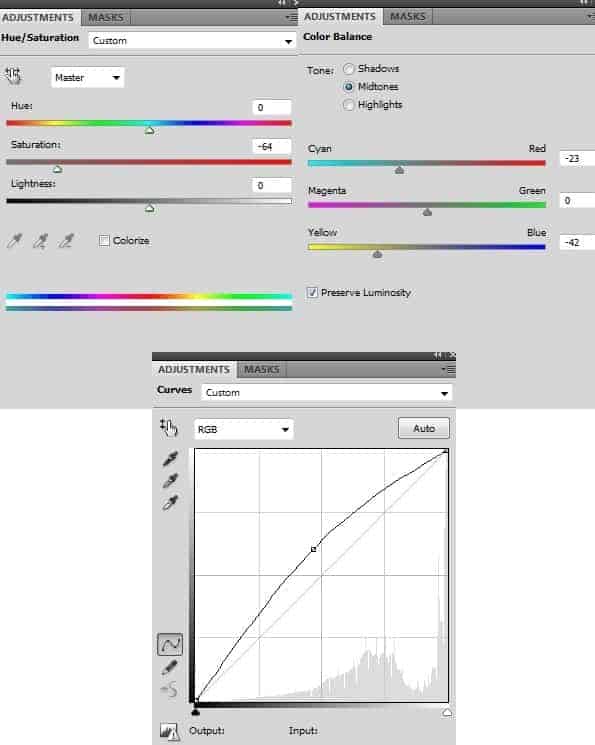
Then I use soft black brush with opacity 100% and 20-30% to erase some parts on Curves layer mask. You can see how I did it on the mask and result on picture:
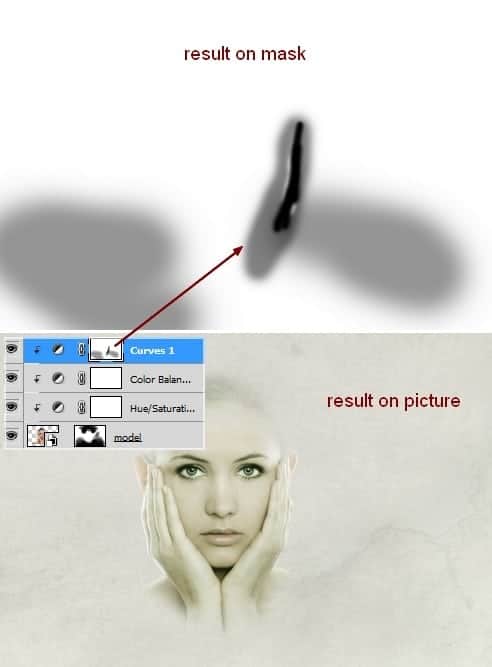
Step 6
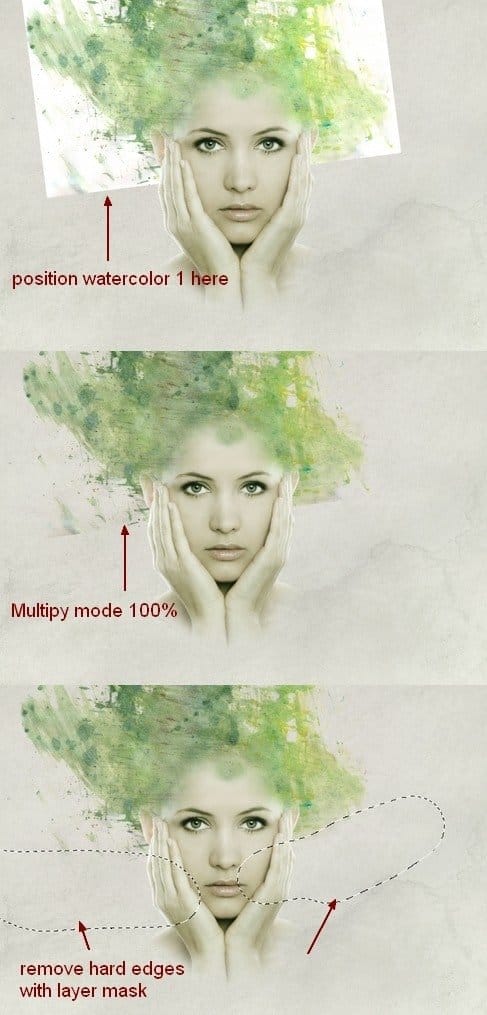
Drag watercolor 1 into top of our picture, place it under model layer. Convert it to Smart Objects and change the mode to Multiply 100% then remove some hard edges with layer mask:
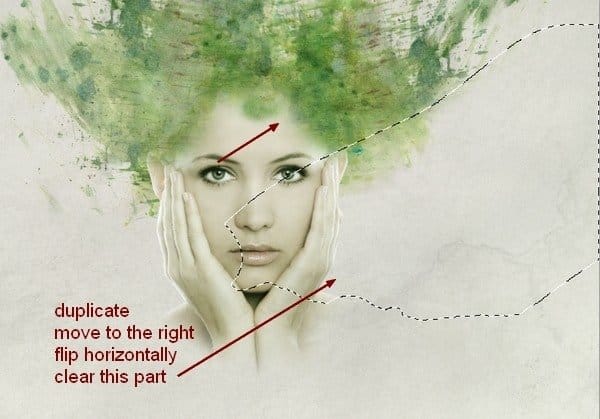
Duplicate this layer and move it to the right after flipping it horizontally. Use layer mask to create the look below:
You must Sign up as a member of Effecthub to view the content.
A PHP Error was encountered
Severity: Notice
Message: Undefined index: HTTP_ACCEPT_LANGUAGE
Filename: helpers/time_helper.php
Line Number: 22


4630 views 1 comments
You must Sign up as a member of Effecthub to join the conversation.