How to replace the background
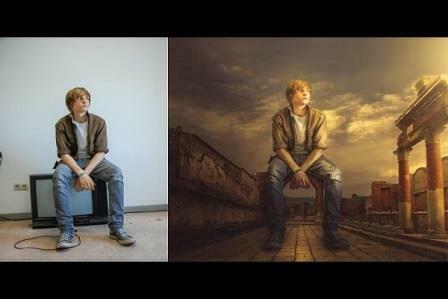
You took a gorgeous portrait in the studio. Now you want to replace the Background image with Photoshop. With dazzling sunsets, bustling cities, or even underwater ...Sometimes taking such photos in the real world is not an option.
In this article, I will show you how to: How to merge a photo in your Studiowith the landscape of your choice.
Step 1: Open two images in Photoshop (1 picturecontaining the pattern you want to split and the other containing backgroundimage you will put it on)
In orderto make it easier to separate portraits, you should select images that providea high contrast between: Portrait and background. If so, then you will easilyseparate the portrait from the background.
For example:
In this post, I choose aphoto of a girl on a white background. This is a high contrast image. So,separating the girl from the picture is very easy.
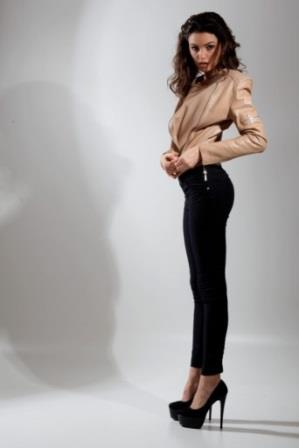
And she will be placed in this context.
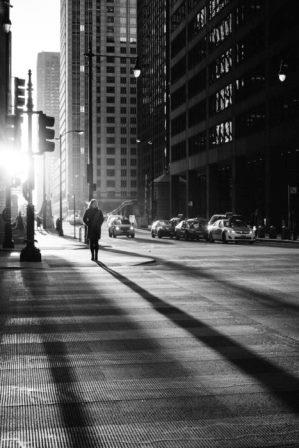
Step 2: Create a selection for the object youwant to replace the background for the image.
Use the Selection Tool to create a selectionfor the object. Here, I will use the Magic Want Tool.
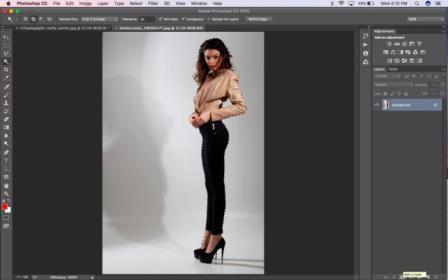
Step 3: Create a Mask Layer. Once the object has beenselected. You need to create a mask layer for the image by: Click the littlerectangle icon that has a circle in the middle of it. The icon is located inthe bottom right corner of the Layers palette.You will see a black image appear in the Layers panel. At the same time thebackground of the picture is lost.
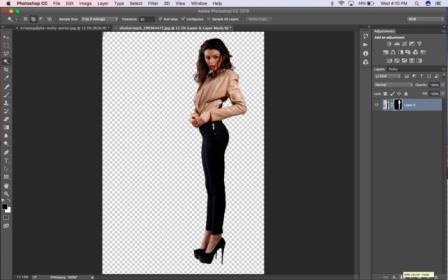
Next, you will drag the entire Masked Layer to the new image like this.
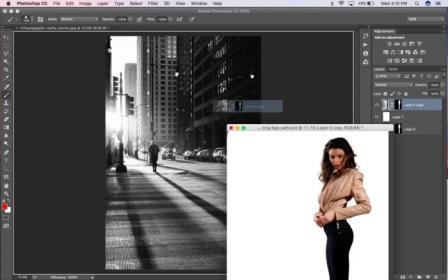
Now the masked layer is placed on the new background.
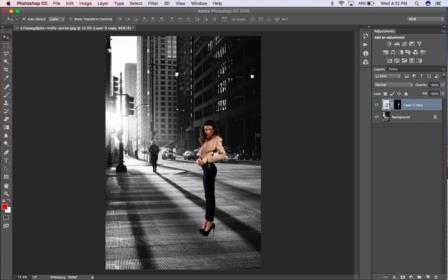
Step 4: Make the picture morenatural.
In other words: You make thegirl look like she's actually standing at the scene. By using the same layermask at the portrait. And use Hue /Saturation Adjustment to turn the girl into black and white so that it will match the background of the picture.
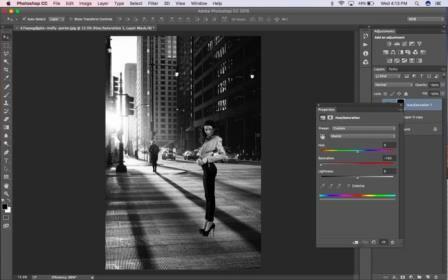
Step 5: Create a shadow for the model (girl).
Make a shadow of the patternby:
· Copy thegirl onto a new layer and pour it black.
· Hold (CTRL+ T) to rotate the image.
· Click onbounding box -> distort.
This way you create a blackshadow for the girl.
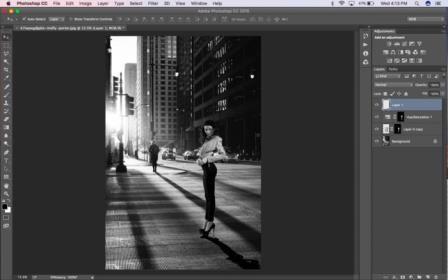
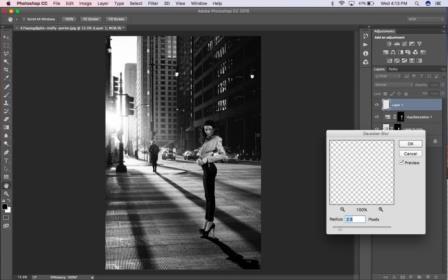
Next, you will blur the shadow to make it look more realistic by using Filter -> Gaussian Blur and adjustingthe radius (adjust the radius).
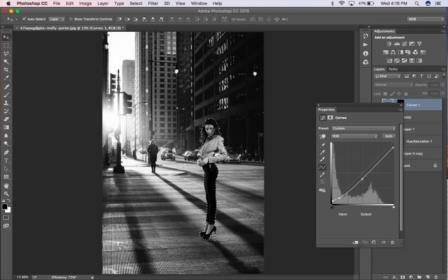
Step 6: Adjust the brightness of thesubject to harmonize with the surrounding environment.
By:
Using the mask available toadd Curves layer to the image,adjust the brightness of the image.
There are still a few pixels lacking the "grain" of the original image
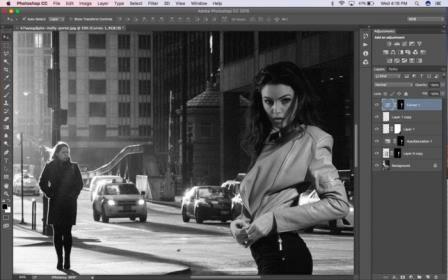
Step 7: Grab the image.
To add the particles, select Filter -> Add Noise andadjust the Amount until it matchesthe current image
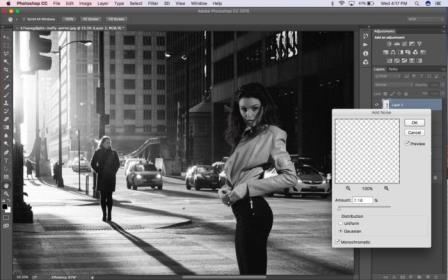
Step 8: Create a bright/dark areafor the picture. It is necessary to darken the right side of the model to matchthe light of the current image. Use the OriginalMask and create a new curves layer and fill it with black on the right.
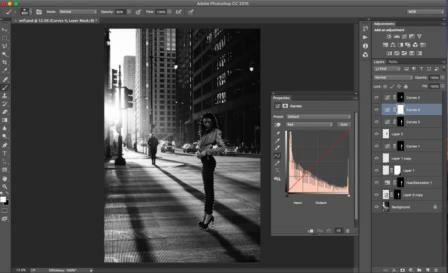
You will do the same. But highlight the left side to add more light from thesun to the girl. You should only select a thin area on the left side of thegirl so that only her left side is illuminated from the sun. Thus the picturewill look more natural
Thanks for reading my writing.
Good luck!
You must Sign up as a member of Effecthub to view the content.
A PHP Error was encountered
Severity: Notice
Message: Undefined index: HTTP_ACCEPT_LANGUAGE
Filename: helpers/time_helper.php
Line Number: 22


1523 views 0 comments
You must Sign up as a member of Effecthub to join the conversation.